
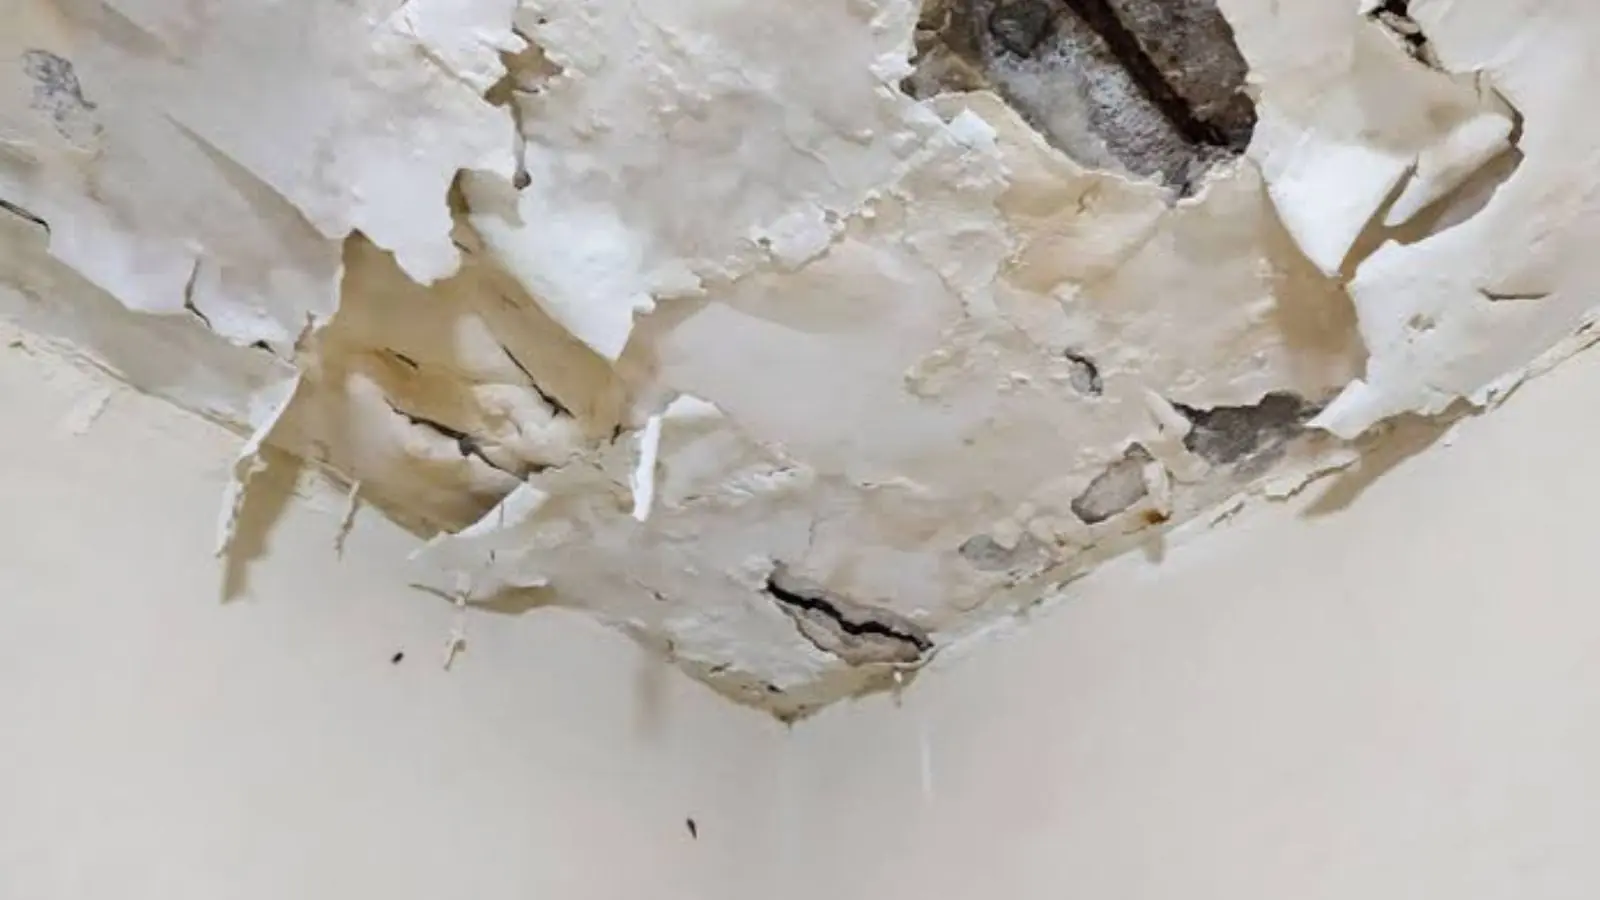
Do not patch until these three things are true
A ceiling repair fails when the water is still there. Before any patching, confirm that the leak is stopped, the drywall is dry through the thickness, and nothing heavy is hanging from the damaged section.
Check the source first: a roof leak, a pipe in the room above, an air conditioner line or a shower pan. Then touch the stain. If it feels cool, soft or spongy, the board is still holding moisture. Press with a screwdriver tip, and if it sinks in easily, the drywall has lost its strength.
If the stain is brown and spreading, the ceiling bows, or water drips when you press, treat it as a structural problem. Emergency water removal is the right first call there, and the repair waits until everything has dried.
Step-by-step repair for dry, solid damage
- Protect the room. Cover the floor and furniture, and wear eye protection and a dust mask for the cutting and sanding.
- Mark the damaged area with a pencil, extending a few inches past the stain on all sides, and cut it out with a drywall saw to a square or rectangle.
- Look into the cavity. If insulation is wet or there are dark growth patches on the framing, stop. That needs drying or mold remediation, not a patch.
- Install blocking along the cut edges if the joists are too far away, then screw a new piece of drywall in place so it sits flush.
- Tape the seams with paper or mesh tape, then apply joint compound in two or three thin coats, letting each coat dry and sanding lightly between coats.
- Seal the patch and the old stain with a stain-blocking primer. Plain paint alone lets the brown ring bleed through.
- Match the texture, whether knockdown, orange peel or smooth, and paint the whole ceiling plane so the patch does not show as a different sheen.
A patch can be done in a weekend because of the drying time between coats. Rushing the compound is the most common reason a patch shows up again after the first coat of paint.
Keep the tools simple: a drywall saw, a utility knife, a taping knife about six inches wide, a wider finishing knife, a sanding sponge and a roller. Use a lamp held low across the ceiling when you sand, because raking light shows ridges that flat overhead light hides.
Plan on two to three coats of compound with a full day between them in a humid room. A damp bathroom or a closed-up room can add time, so a fan that moves air across the patch without blowing dust around helps.
Match the ceiling condition to the right action
| What you see | What it means | Next step |
|---|---|---|
| Light stain, board is hard and dry | Surface moisture, source fixed | Prime with stain blocker and repaint |
| Stain with a soft spot | Board is wet or weakened | Dry it, then cut out the soft section and patch |
| Bowing or sagging section | Water trapped above the board | Stop, keep the room clear, call for removal and drying |
| Dark growth on the board or in the cavity | Moisture has been present for a while | Dry the area and arrange remediation before patching |
| Large area or multiple rooms | Larger loss or ongoing source | Call for an assessment, then plan the rebuild |
If the ceiling has already come down, the safety steps matter more than the repair. See the related guidance on San Bernardino water damage or Rialto water damage for how dispatch handles active leaks outside Colton.
When a patch is the wrong answer
Patching is cosmetic. It does not dry a wet cavity, fix a failed roof, or replace insulation that has soaked through. When the damage covers a large area or the source is unknown, an assessment with a moisture meter and a thermal imaging camera saves repair money because it finds the extent before drywall goes up over wet framing.
A good rule is that a ceiling that needs more than a patch plus paint deserves a professional look. Repairing a ceiling twice costs more than drying it once.
Colton note: storms, roofs and permits
The National Weather Service's 2023 yearly summary for the San Diego forecast area, which covers the Inland Empire mountains and foothills, records January and March atmospheric rivers and Tropical Storm Hilary in August of that year. It describes regional storms rather than Colton totals, but it is a reminder that roof leaks often show up as ceiling stains after a heavy winter storm.
A stain that traces back to the roof will return if you only patch below it. Before any roof or structural repair, call Colton's Building and Safety Division and ask whether a permit applies, since that office handles plan check, permits and inspections in the city.
After a storm season, check ceilings in rooms under the roof valleys and around chimneys and vents, where flashing is the likeliest failure.
Frequently asked questions
Plain paint lets the stain bleed through. Seal the area with a stain-blocking primer first, then paint the full ceiling plane for an even sheen. Confirm the board is dry and the source is fixed before you seal anything.
A moisture meter gives a reading, and without one you can press the area. If it feels cool, soft or sinks under a screwdriver tip, it is not ready. Wait and watch for any new staining before you cut.
Often, but not always. Roof leaks, plumbing in the room above and air conditioner lines all cause ceiling stains. Look at the roof valleys and flashing and check the room above before deciding.
A plain drywall patch usually needs none, but roof or structural work might. Colton's building division issues permits and runs inspections, so describe your project to them before you start.
Keep people out of the room, avoid pressing on it, and call. Sagging means water is trapped above the board, and the weight can bring it down. Drying and controlled removal come before any repair.